Touch firmware tests
Preparing the Testing Host
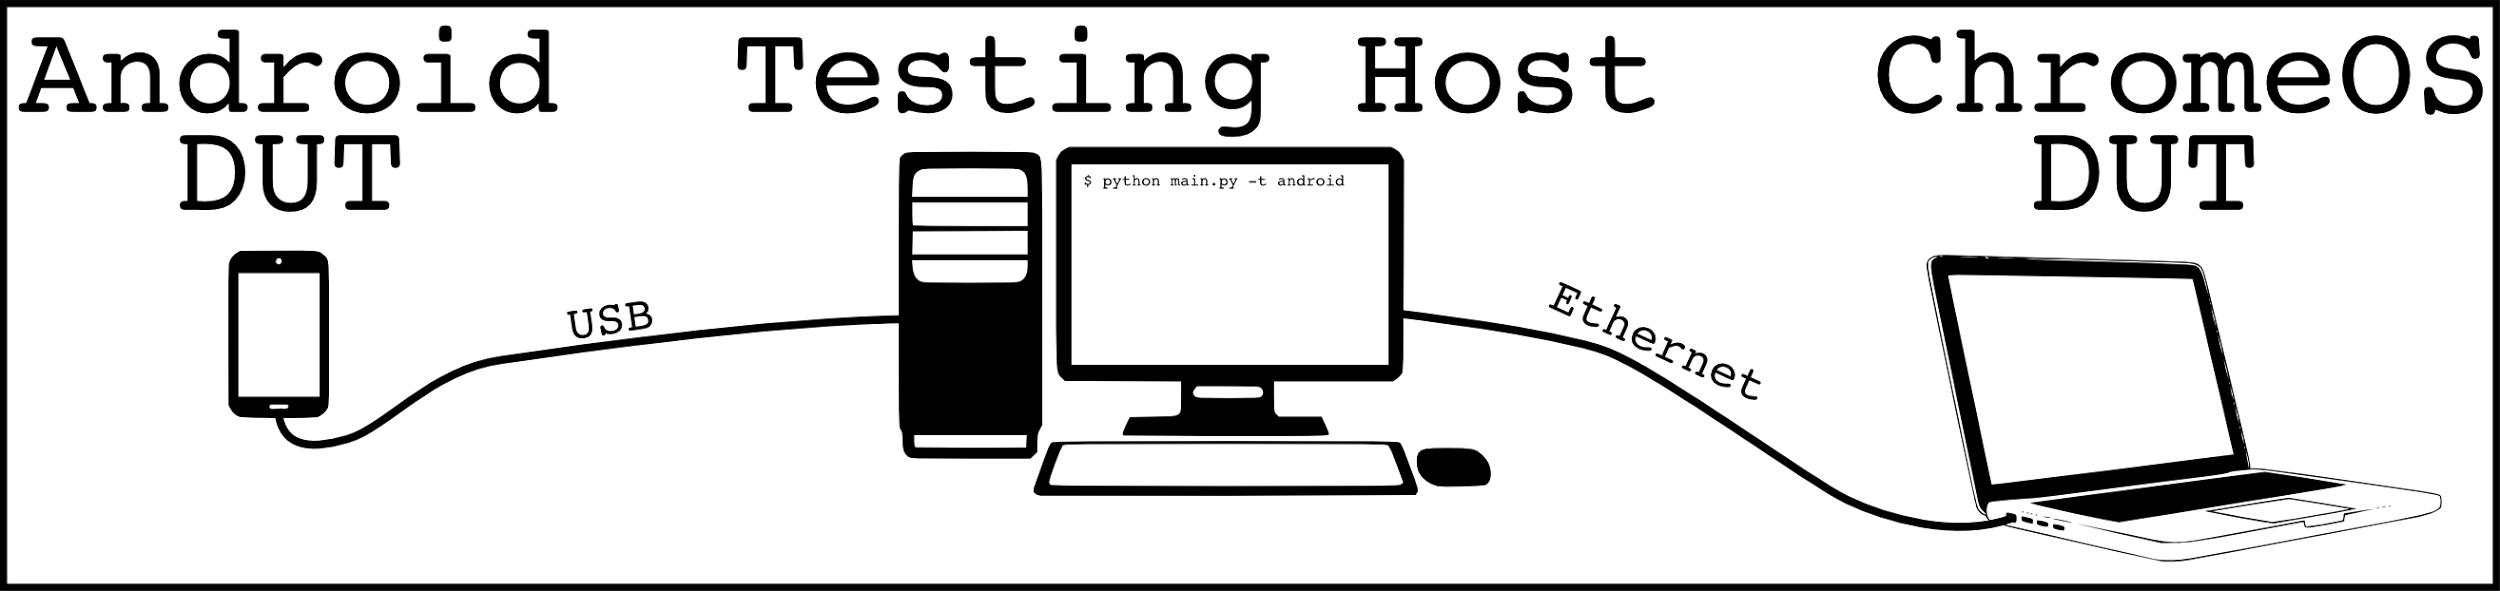
These instructions describe how to set up the code and its dependencies on the host, the workstation you will actually be running the tests from. Usually the host is a normal development machine. It is not the device under test (DUT).
Initial setup
The first time you configure the host to run touch firmware tests, the following steps are required:
- Clone the git repo that contains the test scripts. It is possible to
clone the repo without a full Chrome OS checkout, by running the
following:
git clone <https://chromium.googlesource.com/chromiumos/platform/touch_firmware_test.git>This command creates a newtouch_firmware_testdirectory in your working directory, containing a number of Python scripts. - Install the PyQtGraph plotting library, which is a dependency for the touch firmware tests. Use the provided installers for Ubuntu and Windows and follow the instructions on www.pyqtgraph.org to install this library.
Updating to the Latest Version
If you have previously checked out the test source code, simply pull the latest
patches from the git server by navigating to the touch_firmware_test directory
and running the git pull command.
Preparing the DUT
The firmware test works for both Android and Chrome devices. However, configuration steps vary according to the type of DUT you are testing.
Android Devices
- Verify
adbis installed on the testing host. You can follow the steps described on this page or use a different procedure that works for your environment. - Connect your Android device to the testing host.On the host, you
must be able to connect to the DUT via
adb. In the simple case the DUT is physically connected to the host via USB. Other configurations, such as adb-over-wifi, are also possible, as long asadbcan communicate with the DUT. - Enable USB Debugging on the DUT. Using these instructions or similar steps, enable Developer options on the Android device. In the Developer options panel, select USB debugging. The exact procedure depends on the device. If you cannot locate these features on your device, search the Internet for “USB debugging <your-device-type>”.
- Verify the configuration of your DUT and testing host by running
adb shellin a terminal window on the host. It should open a terminal connection to the DUT with a command prompt.
Chrome Devices
-
Install a Chrome OS test image on the DUT. A test image is required (versus a normal Chrome OS image) to allow the firmware test to use ssh, evtest, and other testing utilities not included in release images. To get a test image, run the following:
cros build-packages --board=$BOARD cros build-image --board=$BOARD --no-enable-rootfs-verification test -
Connect the DUT to a network the testing host can access. A USB-Ethernet adapter connected to a LAN is recommended, to minimize lag and dropped connections. It is also feasible to use a wireless connection.
-
Verify the configuration of your DUT and testing host by running the command
ssh root@$DUT_IPto connect to the DUT via SSH. If prompted for a password, usetest0000. A connection to the DUT should be established.
Running the Test
- On the testing host, navigate to the
touch_firmware_testdirectory and run either:
python main.py -t chromeos -a $IP_ADDRESS
for Chrome devices, or:
python main.py -t android [-a $DEVICE_STRING]
for Android devices. To display additional command line parameters that configure the way the test runs, run
python main.py --help.
- Follow the screen prompts and perform the gestures indicated on the touchpad or touchscreen of the DUT.
- When all the tests have run, a file named
report.htmlis generated. Open this file in a browser to view the results.